Updating REST Multi User 4.0 WINDOWS (also Single User w/ Remote Access)
ALWAYS WORK ON A COPY!
Treat your business data with tender loving care. Always work on a copy of your data file when performing major operations or if you're just not fully comfortable with the possible outcome of your learning process.
IMPORTANT: Remember to quit REST before making the copy. Being able to go back to a pristine original if need be is always a nice thing. So look for the AWOC alert!
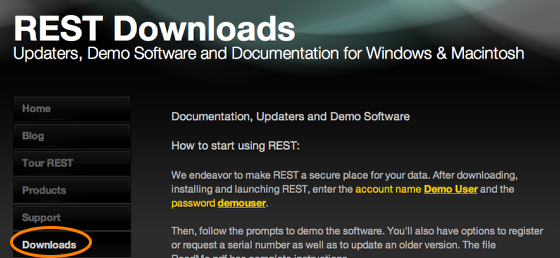
From our website www.realestatesuccesstools.com
Choose Downloads
Updating REST Multi User

NOTE: REST Multi User 4.0 will only open in FileMaker Pro 10 or newer. Please contact REST support if you have not obtained FileMaker Pro 10 updating information.

Scroll down the page and choose Multi User Downloads
Enter with emailed login information
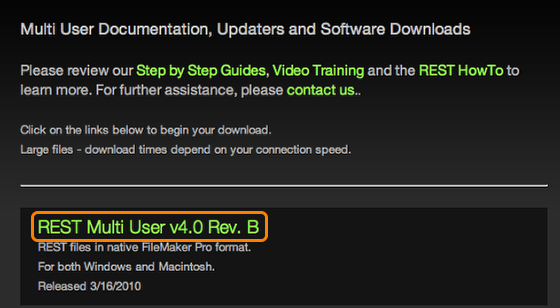
Click on REST Multi User
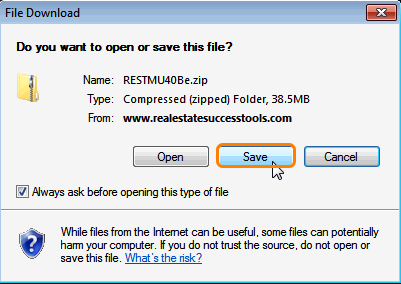
From the dialog box choose Save
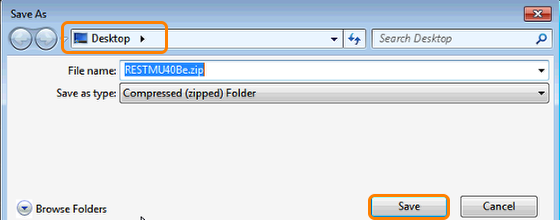
Save to the Desktop
Unzip the REST Multi User file you saved to your desktop
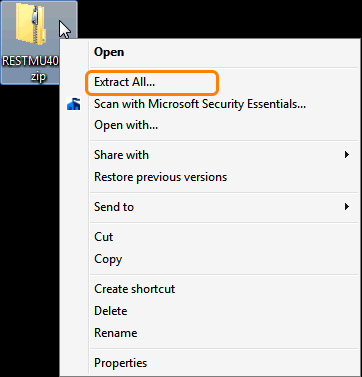
Right click and choose "Extract All".
Extraction Wizard
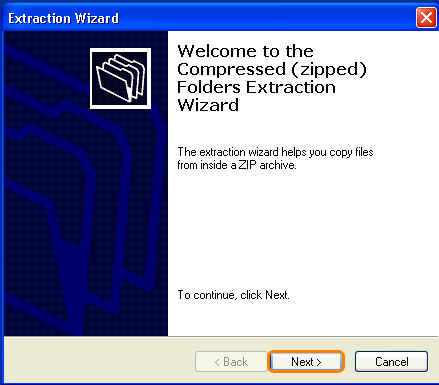
Click "Next".
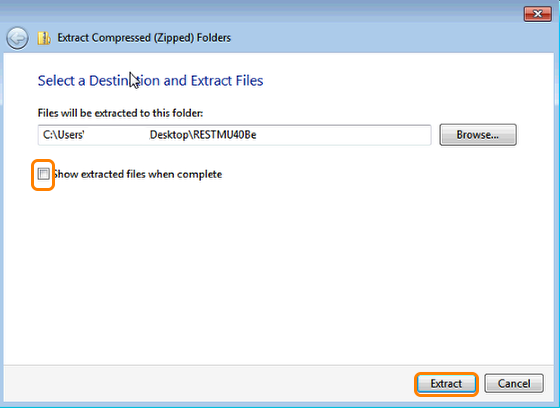
**Uncheck Show extracted files
Click "Extract"
REST User Record clean up
If you have user records that need to be deleted because that user is no longer with you, this would be a good time to make any changes,
as you will be able to reassign records to a different user at the end of the update process.
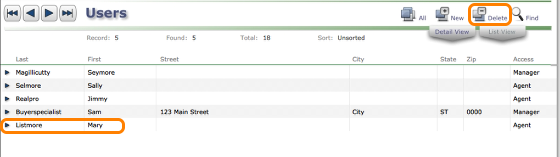
To Delete a user record, go to the Preferences area of REST and show All Users.
Choose the User record you want to delete and click the Delete Key (top right side of screen). This can be done in List view or Detail view.
Be sure you are on the User record you want to delete!
This can only be performed with an Owner-level Access!
Locate your current REST folder (default is Program files)

Navigate to your Program Files folder:
Start Menu>My Computer>C Drive>Program Files. If these files are hidden, reveal.
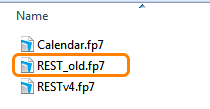
Locate the REST.fp7 file
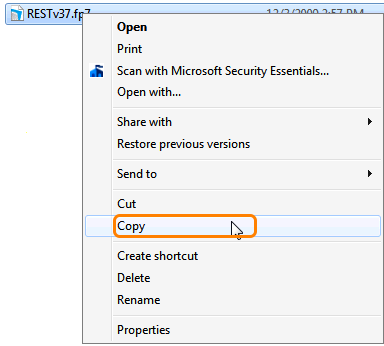
a. Copy the REST.fp7 file (control-c or right-click). Example shows the RESTv37.fp7 file. Yours may be another version.
b. Paste the .fp7 file to your desktop (control-v or right-click).
Prepping your old REST.fp7 file

Click once to highlight the file name; click a second time to edit.
Renaming your old REST file

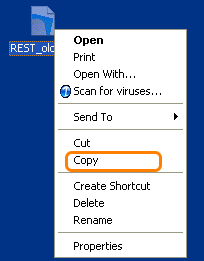
Highlight and rename this file (exactly) REST_old.fp7
***NOTE: Verify that you have re-named the REST file EXACTLY REST_old.fp7 or the updater will not work successfully!
NOTE: If the extension of file is not displayed, do the following:
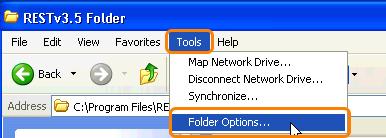
From the Tools Menu: Select > Folder Options.
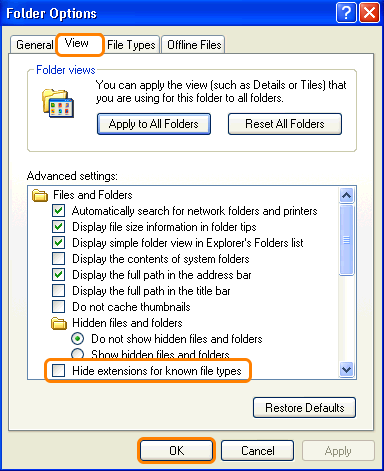
View Tab.
Un-check "Hide extensions for known files.
Click "OK".
Copy (or drag) the REST_old.fp7 file into the NEW RESTMUv40 folder you downloaded.
Ready to run the Updater
With REST_old.fp7 now located in the RESTMU 4.0 folder, you are ready to run the updater.
Launching REST v4.0
NOTE: Before running the REST 4.0 updater user has confirmed that FileMaker Pro 10 or newer has been installed on the REST host. If you have not installed FileMaker Pro 10 do not run the updater! contact REST support with any questions about updating FileMaker Pro.

Launch FileMaker Pro from shortcut on desktop to open the REST4.0 File.
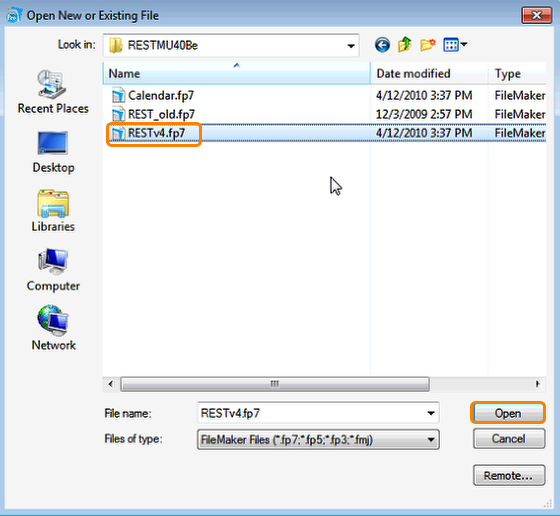
Highlight the RESTv4.fp7 file and click Open
First Login Information
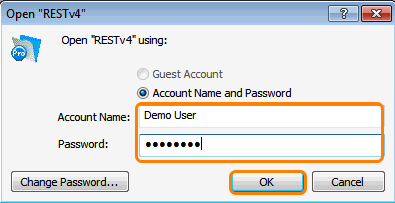
REMEMBER THIS IS AN EMPTY REST FILE, YOU MUST ENTER THE FIRST TIME WITH:
Open REST using:
Account Name: Demo User
Password: demouser
Click "OK".
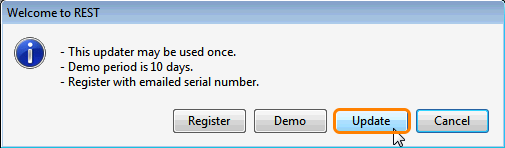
Click the "Update" button.
Verify that each step has been followed.
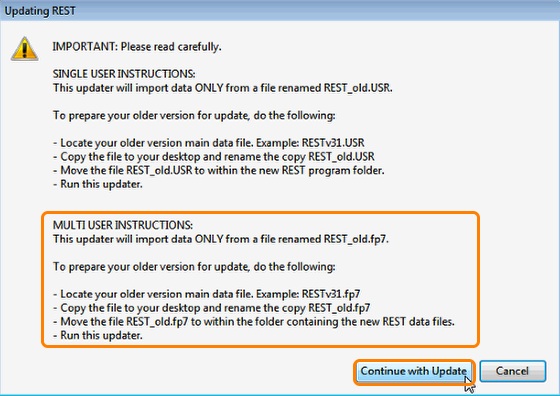
Click "Continue with Update" when you are ready to proceed.
REST sample Action Templates
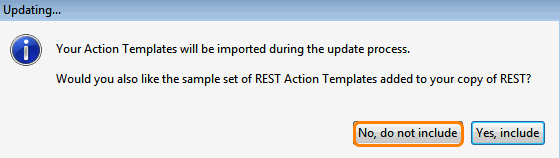
Click "No, do not include" if your current version of REST already has the 6 sample REST Action Templates.
NOTE: REST 4.0 has one additional Action Template that can be used/modified for reoccurring event's like Office Meetings every Tuesday. If you would like to add that additional Action Template, click YES, Include and REST will include the Sample Action Templates. After the update, please check your Action Templates and delete any older duplicated Templates if you find you do not need them.
REST sample Mail Templates

a. Click "No, do not include" if your current version of REST already has the 29 sample REST Mail Templates.
b. Click "Proceed".
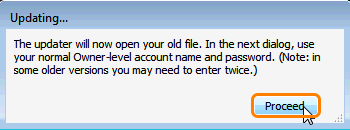
Opening Old REST for Update
The updater will now open your old copy of REST.
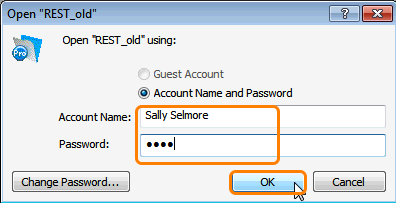
Here, enter your normal Owner-level account name and password.
Click "OK".
Record Assignment
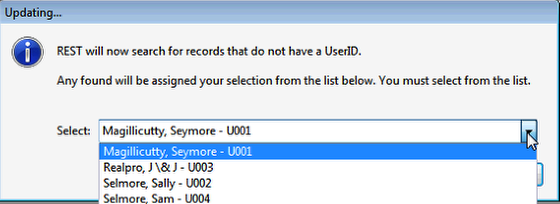
This is where you can reassign records from a user that has been deleted from the database. All "orphan" records will go to one selected user.
Select a user
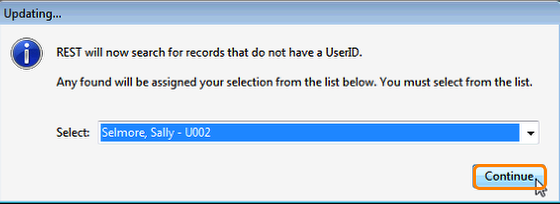
Click "Continue".
Update Complete!
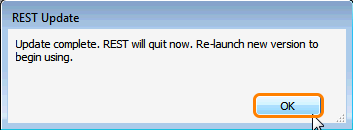
Re-Launch and begin using your new Version of REST!
Update Notes:
After your update is complete we recommend you perform a little clean up.
- Remove the REST_old.USR file from the new REST folder.
- Once you are confident that your new Version of REST has updated, you can delete or archive the
older version of REST.
-Run a backup of your newly updated REST